Showing posts with label micro art studios. Show all posts

Friday, 16 June 2017

How to: Paint a Mosaic Resin Base

Hello friends!

I don't think I've ever been as happy with my basing as what I've developed for my Haqqislam Infinity forces. These bases are  satisfying to paint, look fantastic, and best of all are quick and easy to do! The techniques I use here can be employed for any sort of textured resin base, and I hope you find them useful!

For this army I'm using the Micro Arts Studios 'mosaic' resin bases. These are great quality casts with some lovely subtle texture to them that this process really brings out.

Step #1: Select bases and drill holes. First I choose which base will be used for which figure. Situate the model on it during assembly and drill holes in the base to mark where the pins will be. I note which figure goes in which slot by writing in permanent marker on the underside of the base. Then undercoat the bases with your preferred color using a rattlecan, I went with Games Workshop's "Mournfang Brown" spray.

Step #2: Base colors. Using an airbrush I went over the entire base in with Vallejo Model color's "Sand Yellow". It took about 3 coats to get a nice strong tone across it, working off of a brown undercoat. I then used a brush and painted sections of the mosaic using Games Workshop's "Stegadon Scale Green" and "Doombull brown".
Bases after step two.
Step #3: First layer of shade. I used Scale 75 "Inktense wood" wash through the airbrush to get this first layer. I sprayed this almost parallel to one section on the side of the base in order to have the ink catch the raised edges of the base texture. The Scale 75 washes are very strong and even with this limited usage you get a lovely tint out of the base layer of paint.
These are the same bases after the first shade. Note how there's a lot more ink on the side of the base in the top right than there is on the base itself. This is because I only wanted it to skim the top and was spraying most of the ink on the side of the base to help control the amount going over the top.
Step #4: Second layer of shade. I used the exact same airbrush technique only this time using Army Painter "Strong Tone" wash, which is a very natural tone to bring everything together. Once again I focused my spray against the side of the base in the exact same spot as the previous shade in order to only skim the top of the base and draw out its texture.
Bases after step three.
Step #4: Detail work. Once the second shade has fully dried, paint the rims of the base black, and do some edge highlighting around only the outer rim of the base to make things pop a bit. I didn't bother doing any edge highlighting inside the base as I knew I was about to use pigments anyways.

Step #5: Varnish bases. This is really important because we'll be wiping the bases down with water when we use pigments and the inks and washes will absolutely be wiped off in the process if you haven't varnished it. I used Army painter "Aegis suit" rattlecan varnish but you can use any sort of satin or gloss varnish that offers decent protection against water.

Step #6: Pigments. Use vallejo's "Burnt Sienna" pigment and mix it with a bit of water to get it nice and sludgy. It should be thick enough that it doesn't run when you put it on a flat surface, but runny enough that it still falls into and fills the gaps of the bases. Using a cheap brush you slam this mixture into all the crevices of the base. Have fun and be as messy as you want, none of the pigment on the surface will be staying there.
Bases after step six. Pigment spackled into the cracks.
Step #7: Wipe away the pigment. This is the funnest part of the process! Dampen a cloth or piece of paper towel a bit and literally wipe off the tops of each base. After 1-3 passes all of the pigment on the surface will have disappeared but the pigment in the cracks will remain. Your varnish will protect your previous work from getting wiped off. It's sooooo satisfying.

However you need to ensure the previous layer of pigment has completely dried, preferably overnight, before doing this. Otherwise you might remove some of the pigment in the cracks!
Finished bases after the pigment has been wiped away.
Step #8: Final varnish. After giving the remaining pigment another chance to fully dry (it doesn't need quite as long this time) you should do one more layer of varnish to set it in place and voila, mosaic bases! The varnish will also help protect your work if you decide to paint your figures after they're attached to their bases as I do. Any stray paint that gets on the base can be wiped off with water without issue thanks to the varnish.
My test model getting painted on top of a completed base. Looking good!
These techniques should work well for any sort of textures resin base! I hope it has proved useful!😄

Update XI: Haqqislam Forces, Test Schemes, and Chipping Experiments

Hello friends!

It's been a little under two months since my last update so I thought I'd let you know what I've been up to hobby-wise since the start of May.

1. Finished getting my Infinity JSA army tabletop-ready.

First I focused on finishing the bases and getting an airbrush and some base layers down on the two remaining models for my JSA forces. With a layer of varnish these two were up to snuff with the rest of the army and ready to use on the tabletop while I finished their brushwork.

My Oniwaban proved to be an incredibly effective attacker in my first two games with him. Really cool high-risk/high-reward unit!
However instead of being satisfied with my JSA army and getting down to finishing them off with brushwork I instead completely shifted gears and began assembling and prepping a non-sectorial (aka 'vanilla') Haqqislam force.

Even now it's entirely unclear to me why I did this beyond liking the faction and having the Red Veil forces available to me. I really am a glutton for punishment...

2. Assembled and started prepping a Haqqislam army for the tabletop.

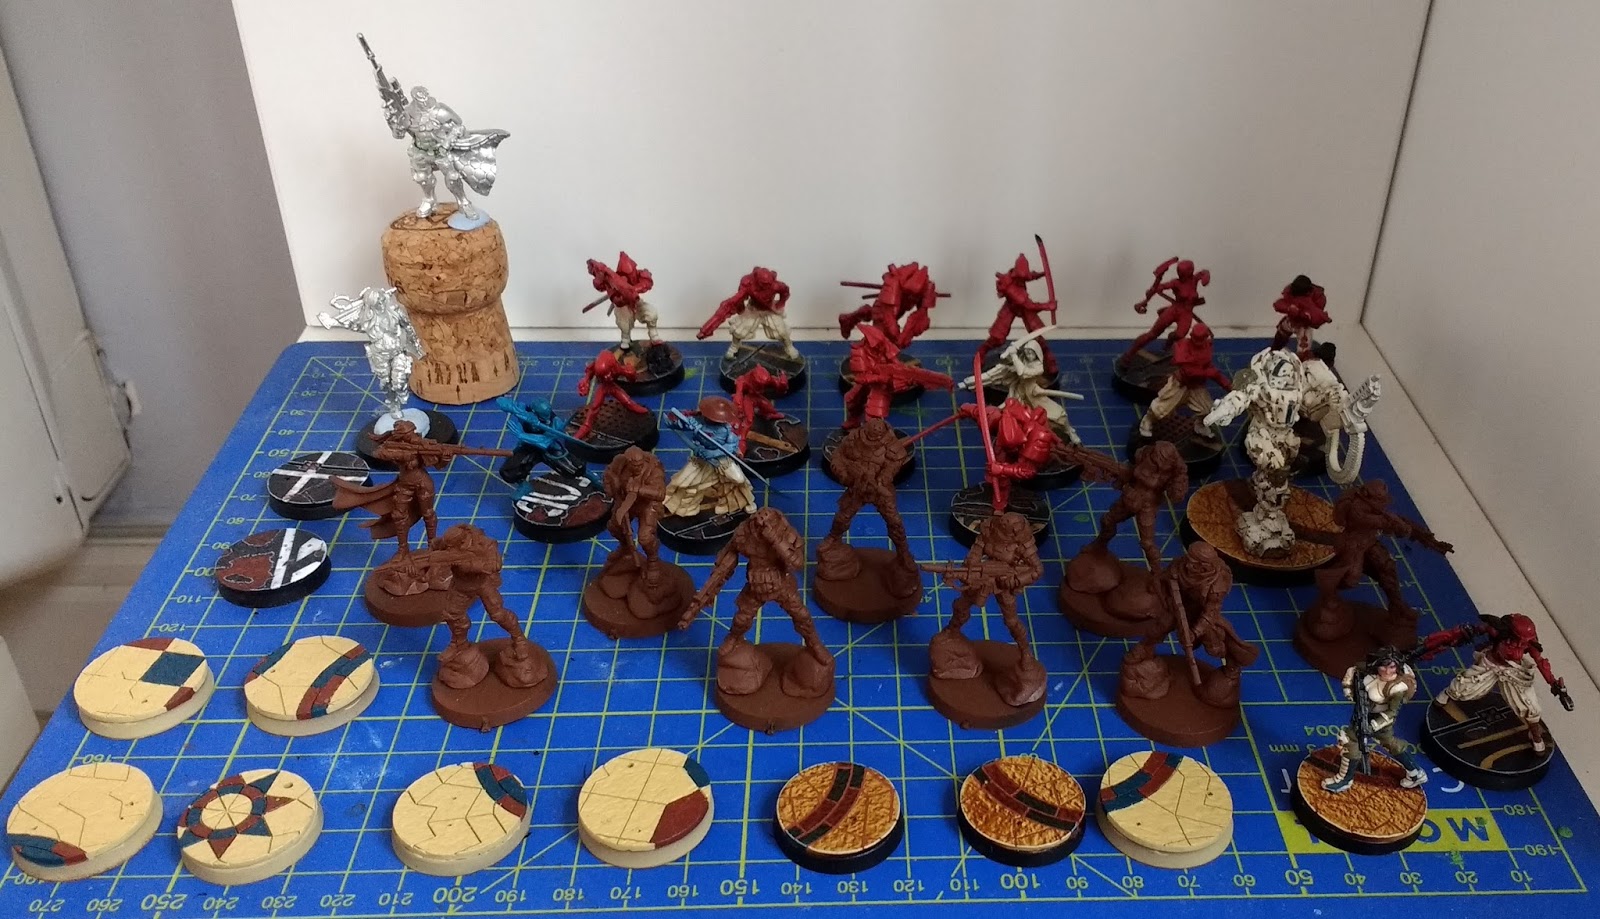
I supplemented the red veil box with a box of naffatuns and this, in tandem with the Knauf mercenary sniper I got with the recent infinity Manga, will make a solid 300 point Haqq list. However it added about thirteen more figures to paint on top of my eleven JSA units.

The current painting backlog, about 24 figures. :/
Consequently instead of having one finished army I now have two partially finished ones and lots of brushwork to do. Thankfully the Haqq bases are now almost entirely done and the figures are airbrushed so at least I'll be able to use both on the tabletop.

3. Initial models for both JSA and Haqqislam armies

Once I settle on a color scheme for an army I always get an initial test model to at least 70% completion with the colors I've chosen so i'm aware of any particular challenges that the combination of paints or colors might offer me. For my Haqqislam forces this was a female Ghulam line trooper.

Initial basecolors down over a completed base. I've uploaded a detailed basing tutorial seen here.
Haqqislam troops look somewhat less "high-tech" than other factions and I wanted to use earthy tones to reflect that realism while still keeping the colours bright and punchy on the tabletop. I settled on cream-coloured armour with green clothing  accompanied by some dark blue spot colours.

Working on this model proved really useful, particularly in regards to how to approach the cream armor, as I realised that doing white zenithal highlights on the airbrush beforehand was a pointless step. Definitely a time saver in the long run!

I also made my first attempt at doing a really simple NMM effect with two shades of metal over the black basecoat on the weapon. I am SO pleased with the result, which actually a lot faster than doing a full bascoat of true metal. This is probably the first time I've felt like my metal tones look good.
The current state of the model after further work. Armor and weapon are basically finished here but the skin, green, and blue have all yet to have any highlight/shading.
Rear view.
I'm definitely really pleased with the overall effect of my color scheme and it's been a lot of fun to paint.

I had already got to this point with a JSA test model, but continued to work on the Doctor figure in order to finalise my approach. I'm only somewhat happy with the result but this told me a couple things about the process that i'll keep in mind for the remaining figures. Specifically how to approach highlighting the puffy pants and also that the red armour doesn't really need a glaze to get the most out of it.

Front view. Armor, weapon, and pants pretty much done here. Skin, hair, and brown spot colors need a lot more stuff going on .Haven't evne gotten around to base coating some of the straps yet.
rear view
4. Chipping experiment on Haqqislam Heavy Infantry

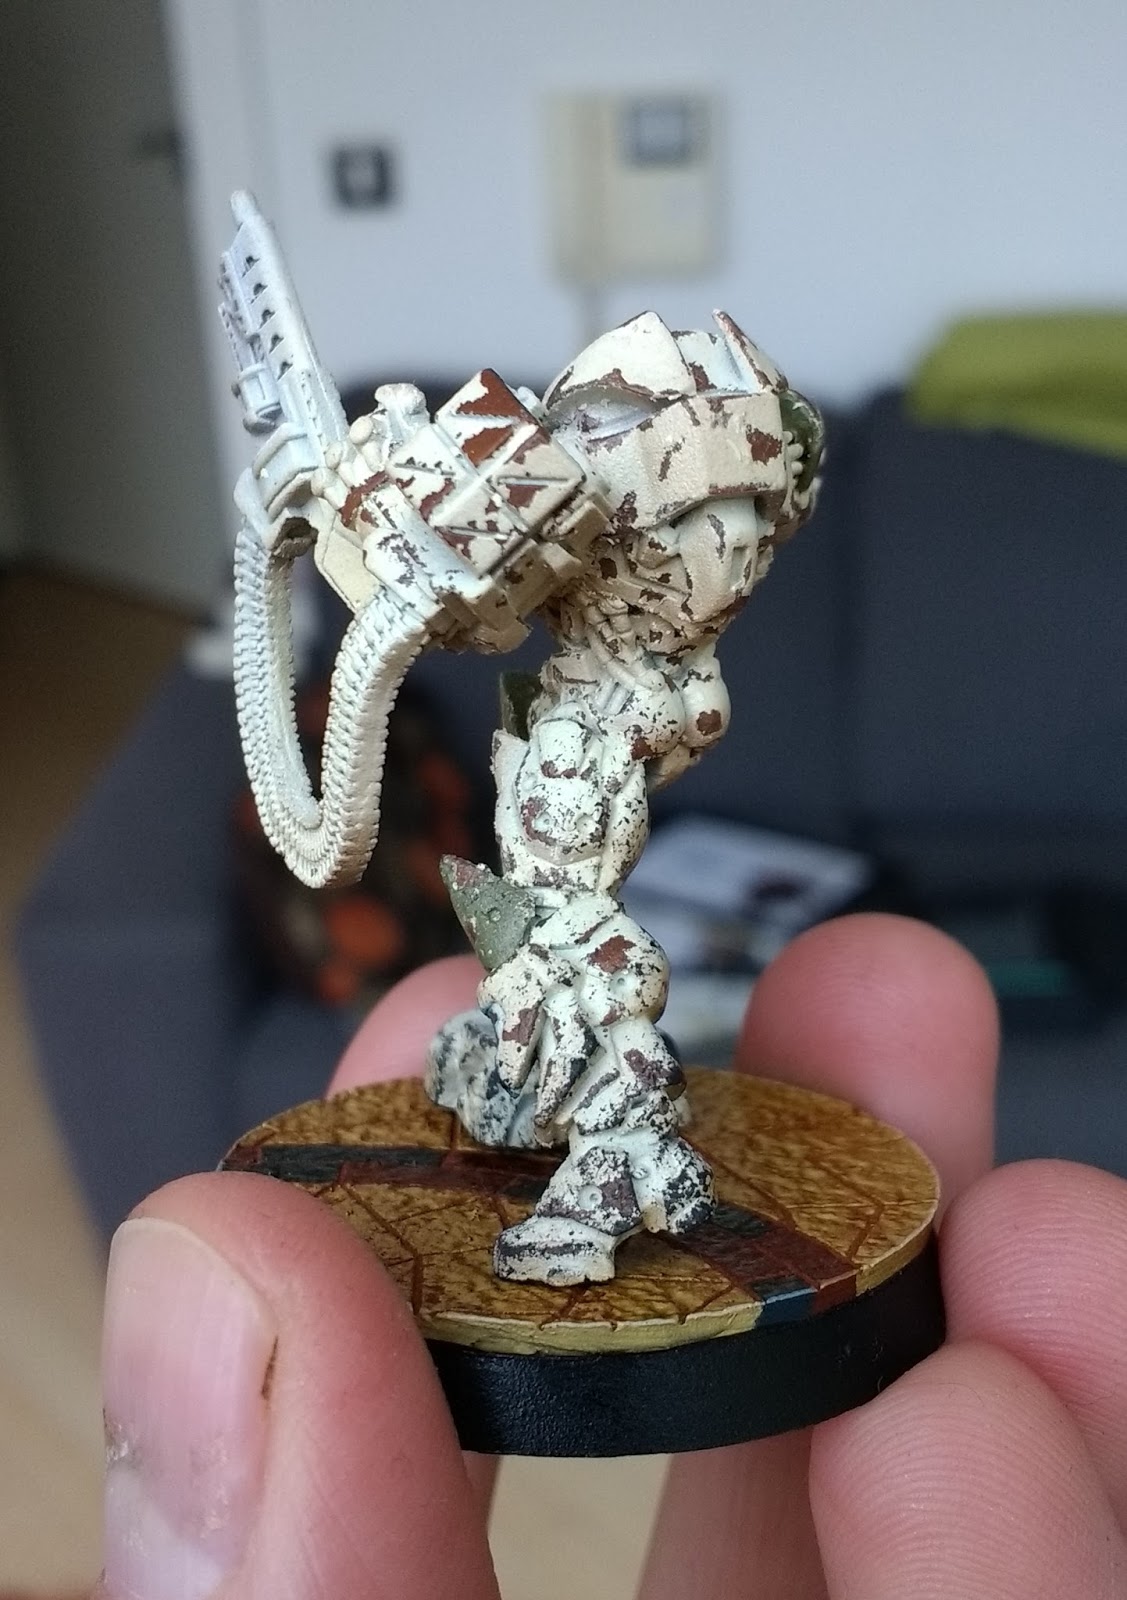
One of the Haqqislam units from the Red Veil box is encased head-to-toe in armour, and I wanted to try something different to set him apart from the others. I decided to use some chipping medium to give him a really weathered look as I'd done on my Gorkanaut around this time last year.

I won't go through a detailed step by step process but I undercoated him with a rattlecan, then sprayed him down with "doombull brown" through the airbrush. I varnished that layer, and then gave it two coats of Vallejo's "Chipping Medium" which comes in a dropper bottle.

Over the chipping medium I airbrushed him with the cream colour from my colour scheme, along with some basic airbrush zenithal shading and highlighting.

How he looked before I started chipping.
I did some spot colors using the greens and blues from the rest of color scheme to add some flavor, and then began the chipping process.

I started using water and a toothpick to chip away at the top layer. However I quickly became very frustrated with the way the Vallejo "chipping medium" behaved.

With the Gorkanaut I had used AK interactive "Worn Effect", which is used the exact same way as chipping medium. However the AK interactive effect has a lot more grip, and while it takes a lot more effort to remove the top layer of paint, it gives you lots of tiny chips which makes for a really realistic rust effect. I ended up using a toothbrush to rub down my Gorkanaut and I was really pleased with the effect.

Unfortunately with the Vallejo chipping medium it was way easier to take off the top layer, so that my initial use of a toothbrush took off almost all of the colour on the side of his right leg. It was very frustrating and upsetting. After letting it dry and fixing up the leg as best I could withe some sponging I stuck to using a toothpick and carefully picked off large flakes of the armour. The takeaway here is that Chipping medium gives you very big chips.

The result doesn't look very natural and makes him look "spotted" rather than actually worn down from use. I can see chipping like this looking fine on tanks, but on an infantry model at this scale you really need to use something else if you want a realistic worn effect with lots of little chips. Another possible solution is to only use one layer of chipping medium rather than two, and also spending more time in the chipping process to get it looking more natural. I admit I was so disappointed I sort of rushed this a bit.

The same model after the initial chips, note the fixes on the side of his right leg from where I took off too much of the top layer.
Thankfully this guy isn't my favourite model ever and I don't expect he'll be getting a ton of table time once my forces expand, so I was happy to just say "lesson learned" and move on. I did give him a bit of sponge weathering before gluing him to his base, and I plan to give him some oil washes which will help tie in the overall look and make things a lot more natural.
After some sponging on the legs and being glued to his base.
Rear view.
Front view. It looks quite sloppy here but once the details are picked out it will look a lot more cohesive.
I'm looking forward to doing something similar with Haqqislam's other heavy infantry unit but using the AK interactive effect rather than Vallejo. I expect it will look much much better!

5. Played some games!

I've actually been playing Infinity quite regularly at my local and I'm really pleased that my hobby work is being used on the tabletop so frequently! There's currently a large casual campaign being run by Corvus Belli and Beasts of War called "Strikezone Wotan" that is really encouraging people to get out and play. People upload battle reports for various theatres of war which impact the overall narrative of the campaign!

I represent the Yu Jing forces with my Japanese army sectorial and you can check out my battle reports and profile here.


Well with that you're all caught up on my hobby times. Thanks so much for looking! 😄

Monday, 24 April 2017

Update X: Japanese Sectorial Army for Infinity

Hello friends,

Further progress has been made on my JSA infinity force so that most of them are now mounted on their bases and ready to actually get some games in. I'd promised myself not to play with unpainted figures but the severely limited amount of hobby time I have available has forced me to alter that stance somewhat. I have completed the airbrushed basecoats and highlights on the figures, and I've fully completed their bases, so I'm about half-finished everything.

The bases in question are 25mm Micro Art Studio "Warehouse" bases available here. I really love the quality on these and I had a ton of fun working on them even though I sort of made things up as I went along. I've used a combination of "road themed" MDF cardboard stencils and Vallejo "Burnt Sienna" pigment to get some fun effects going that have made them really dynamic.
I purposely aimed to keep the tones either neutral or warm with the hints of yellow/red in order to complement the warm parchment/red palette of my troops. Hopefully it should all look relatively cohesive once I have the detail work on the troops finished, which will include a lot of browns.
Some airbrush work on a section of the base that emphasizes the warm tone I was going for.
All of the bases ready to be mounted, apologies for the poor lighting.
From here I mounted all of my airbrushed figures to their respective bases, as it will be exclusively traditional brushwork from here on out.

It should be noted that I have given a satin varnish layer to both the miniatures and the bases in order to protect my work. I can't emphasise enough how useful a layer of varnish is to the painting process for these reasons:

  1. To avoid taking paint off as I continue to work with them. I don't want the natural oils in my hands or the friction of handling to remove finished sections.
  2. To allow them to be used on the tabletop. If you want to play with partially painted figures you had better varnish them so as not to risk losing or damaging your work. This goes double for Infinity figures as they are all metal.
  3. To make it easy to fix painting mistakes. The varnish layer means that any accidents or sloppy moments I have in picking out the details can be corrected easily using a mild paint thinner. The thinner will remove the problem area but not go through the varnish layer underneath and ruin what I've already done.

Above are some close-ups of how the figures look at the moment. The airbrush highlighting/shading is done, and the bases are complete, so all that's needed now is some brushwork to pick out the details.
Here's a picture of the whole army so far. Two of the troops in the back were test models, and two have only recently reached the assembled state but I'm nearly there. Once I've got the latter based properly this should form a relatively viable 300 point all-comers list that I can start fielding regularly.


List ahoy! Miyamoto Mushashi and the Oniwaban are the only models not tabletop ready yet.
In the meantime I have continued to play infinity at the North West Gaming centre. I'm definitely starting to get a feel for the game again, and I'm beginning to come back from my initial run of losses. These are still really casual games against relatively beginner opponents but we're definitely starting to explore how dynamic the system can be. It helps that we've started doing more scenarios as well!

Here are some pictures from my last game in which I took my Aleph forces against a Shasvastii-heavy vanilla Combined Army force. We were playing the Quadrant Control ITS scenario that lets you hold quarters of the table with point costs. My opponent won initiative and chose deployment with a very favourable table-side that gave him lots of great spots for his extensive infiltrating camouflage troops. However even with no MSV on my team I was able to push my way up the left flank with Achilles and a myrmidon buddy under the careful supervision of a Sophotect doctor. The game started poorly for me but I ended up winning the scenario quite thanks to a strong left flank and me (eventually) dealing with some of my opponents threats.

The game board, note the TO camo sniper in the top right and the total reaction HMG drone on the left. Brutal ARO potential from my opponent.
My first time fighting against an impersonator and it was not fun. This mono-filament lady took out my Chain of Command Myrmidon Officer before re-disguising herself and causing this ruckus. I eventually managed to take her out with a combi rifle Deva but she was extremely disruptive.

By using the cover of the corridor Achilles and his buddy were able to push into another quadrant and simply refused to move or go down. I felt a little dirty leaning on him so much, but I figure I'll eventually get rid of my Cutter/Achilles crutch once I start playing my JSA forces.

Finally in other news a brand-new edition for 40k has been announced! It's long overdue and I'm really really excited at a streamlined AoS-like update for the 40k ruleset. It is desperately needed at this point, and I'm looking forward to getting my Orks onto the table again. However I don't think anything will match how dynamic the games of Infinity I've been having lately are, there's just nothing quite like it! I hope I will have the time to play both systems in the future and not be forced to choose one or the other.